

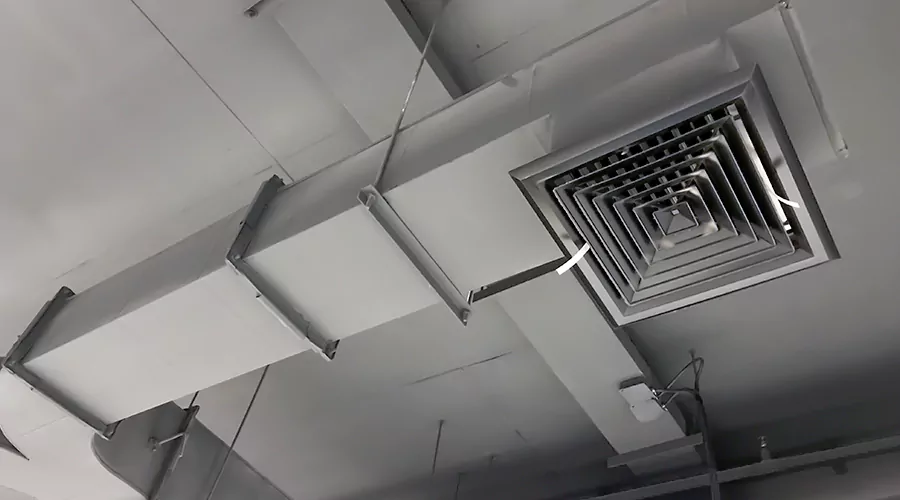
Installing metal ductwork involves designing the air distribution system, measuring the required duct sections, assembling compatible metal fittings, mechanically securing the joints, and sealing them with approved HVAC materials. The ducts must be supported according to their size and construction, insulated where required, and tested for air leakage and airflow. Major supply and return installations should be completed by qualified HVAC professionals because improper sizing can affect the entire heating and cooling system.
Metal ductwork is commonly used in residential and commercial forced-air systems. Galvanized sheet metal provides a rigid passage for conditioned air, allowing trunks and branches to maintain their shape. Metal ducts are available in round and rectangular configurations, with fittings designed to connect equipment, branches, and room registers. Professional HVAC ductwork installation ensures these components fit together properly and support efficient air distribution.
One advantage of rigid metal ductwork is that it is not easily crushed during normal installation or maintenance. However, its performance still depends on correct sizing, proper fitting selection, and airtight joints. A poorly assembled metal network can lose substantial air through gaps at seams and connections.
Installing metal ducts also requires coordination with the building. Trunks and branches must fit around framing, plumbing, electrical wiring, and other services without compromising structural components. The finished installation should provide adequate airflow while remaining accessible for future inspection and maintenance.
What Types of Metal Ductwork Are Used in HVAC Systems?
Residential metal ductwork is generally made from galvanized steel, although aluminum and other approved materials may be used in suitable applications. Galvanized steel is common because it is rigid and can be fabricated into different shapes. The appropriate material and thickness depend on duct size, application, and relevant construction standards.
Round Metal Ducts
Round ducts are frequently used for supply branches and certain main trunks. Standard sections can connect using crimped ends, couplings, and suitable elbows. Their shape provides a relatively efficient passage when properly sized and assembled.
Round ducts may be spiral-seam or snap-lock products. The connection and support requirements depend on the particular product. Duct joints should be mechanically secured and sealed with compatible materials.
Rectangular Metal Ducts
Rectangular ducts are commonly used as main supply and return trunks. Their shape can be useful where the available ceiling height is limited but greater width is available. They may be fabricated from flat sheet metal using folded seams and compatible connection systems.
Large rectangular ducts can require reinforcement or additional supports. Their dimensions should be established through airflow design rather than selected solely from the space available. A shallow duct that is too small can create excessive resistance and noise.
Metal Plenums and Transitions
Plenums and transitions connect ducts to furnaces, air handlers, and other distribution sections. A plenum may carry air into several branches or collect return air from multiple passages. Transitions change the shape or dimensions of the airflow passage between connected components.
These fittings should maintain adequate airflow capacity. Poorly designed abrupt reductions can add resistance. Correct fitting geometry is an important part of the installation.
Common Metal Duct Components
| Component | Main Purpose |
|---|---|
| Round metal duct | Carries air through round passages |
| Rectangular metal trunk | Distributes or collects air for several branches |
| Sheet metal elbow | Changes airflow direction |
| Transition fitting | Connects different shapes or sizes |
| Takeoff collar | Connects branch duct to a trunk |
| Wye fitting | Divides or combines designed duct pathways |
| Supply plenum | Connects equipment discharge to supply ducts |
| Return plenum | Connects return ducts to equipment |
| Register boot | Connects the duct to a room opening |
| Balancing damper | Adjusts airflow within a designed system |
| Metal hanger or support | Holds ductwork in place |
| Compatible duct sealant | Seals seams and connections |
Each component should match the design and installation requirements. Using the wrong fitting can introduce restrictions or create joints that are difficult to secure and seal.
What Materials and Tools Are Needed to Install Metal Ductwork?
The required materials depend on whether the system uses round or rectangular ducts. Basic assembly may involve preformed sections, while custom trunks require fabrication and additional tools. Safety equipment is important because freshly cut metal edges can cause injuries.
| Tool or Material | Purpose |
|---|---|
| Galvanized sheet metal duct | Forms the main air passage |
| Approved elbows and transitions | Connects changes in direction or size |
| Takeoff collars | Creates approved branch connections |
| Sheet metal screws or specified fasteners | Mechanically secures suitable metal joints |
| Drill or nut driver | Installs mechanical fasteners |
| Aviation snips | Cuts sheet metal |
| Hand crimper | Prepares suitable round duct ends |
| Tape measure and marking tools | Establishes dimensions and layouts |
| Compatible HVAC mastic | Seals joints and seams |
| Listed UL 181 closure tape | Seals approved metal duct joints |
| Fiberglass mesh reinforcement | Reinforces applicable larger gaps before mastic |
| Approved hangers and support brackets | Supports ducts independently |
| Foil-faced duct insulation | Reduces unwanted heat transfer |
| Suitable gloves and eye protection | Protects during handling |
| Leakage and airflow testing equipment | Verifies system performance |
Tools should be selected according to the product and work environment. A contractor may also use metal bending or fabrication equipment for custom fittings. Large commercial ducts require additional procedures beyond an ordinary residential installation.
How Do You Size Metal Ductwork?
Metal duct sizes should be based on the airflow required by the connected HVAC equipment and individual rooms. The design must account for the pressure available from the blower and losses through ducts, fittings, and registers. Selecting dimensions solely by matching an existing opening may not provide suitable performance.
ACCA Manual D provides recognized residential duct design principles. The calculations consider the effective length of the airflow path and the required supply and return quantities. The design may include larger main trunks and smaller branches, with appropriate transitions along the network.
Rectangular duct dimensions require particular care. Two ducts with similar cross-sectional areas can have different airflow resistance because of their shapes. A very shallow duct may need additional width to carry the required air without excessive pressure loss.
The contractor should identify the complete duct layout before ordering materials. This reduces unnecessary fitting changes and helps maintain the designed dimensions throughout the installation.
How to Plan a Metal Duct Layout
A well-planned metal duct system uses suitable main trunks and reasonably direct branch connections. The designer should identify where the ducts will connect to the heating and cooling equipment and where air will enter or leave each room. Return pathways must also be included.
The layout should avoid excessive elbows and abrupt transitions where practical. Each fitting adds resistance to airflow, which should be considered during sizing. Branch connections should be positioned according to the design rather than installed randomly.
Building structure is another important concern. Ducts must pass around beams, joists, plumbing, and electrical equipment without damaging required framing. In finished buildings, dedicated soffits or chases may be necessary.
Whenever practical, placing ducts within conditioned space can reduce unwanted heat transfer. When the network passes through an unconditioned attic or crawlspace, suitable insulation and air sealing become particularly important.
How to Install Metal Ductwork Step by Step?
The following steps describe the general installation of rigid sheet metal supply and return ducts in a residential forced-air system. The exact assembly methods vary by duct shape, joint type, and equipment. Major installation work should follow the approved design, manufacturer's instructions, and applicable mechanical codes.
Step 1. Inspect the Installation Area
Identify the proposed duct routes and available working space. Check framing, electrical wiring, plumbing, and other building equipment. Determine whether the installation involves an unfinished basement, attic, crawlspace, or finished ceiling.
Look for moisture problems and other conditions that could affect the materials. Persistent water exposure can damage metal and surrounding insulation. Unsafe access conditions should be addressed before installation begins.
Step 2. Calculate the Required Airflow
Determine how much conditioned air must move through the system. The main trunks should be sized for their connected branches, and individual branches should serve the airflow needs of each room. The return network must provide adequate capacity for the equipment.
Use recognized duct design methods such as ACCA Manual D. A design based only on rough duct length or visual appearance can create restrictions. The completed network should match the blower's intended operating conditions.
Step 3. Prepare a Duct Layout
Develop a drawing or installation plan showing duct sizes, fittings, and connection points. The layout should identify supply and return trunks, branch takeoffs, register boots, and equipment plenums. It should also indicate where supports will be installed.
Planning helps avoid unnecessary fabrication changes. A transition that is overlooked during design can create installation delays or an unsuitable connection later. The installer should know the intended route before cutting materials.
Step 4. Confirm Local Building Requirements
Determine whether permits or inspections are required. Local mechanical codes may govern metal thickness, support spacing, joint methods, insulation, and duct leakage testing. Larger ducts may need reinforcement under applicable construction standards.
If ducts penetrate structural or fire-rated assemblies, additional approved details may be necessary. The installation should preserve required building separations and equipment clearances.
Step 5. Prepare the HVAC Equipment Connection
Identify the supply discharge and return inlet of the furnace or air handler. Determine whether the connections need new plenums or transitions. The equipment manufacturer's instructions should guide the approved fitting arrangement.
Do not attach a duct to an arbitrary equipment cabinet opening. Internal wiring, coils, and drain components may be nearby. The equipment should remain accessible for maintenance after the ducts are installed.
Step 6. Shut Down Existing Equipment
Turn off the affected HVAC system before connecting or modifying ducts. Qualified technicians should follow the required electrical isolation procedures when working near equipment cabinets. The blower should remain off while openings are exposed.
Metal HVAC ducts must also be distinguished from combustion exhaust flues. Furnace flues carry combustion gases and have separate safety requirements. Ordinary supply duct methods should not be used for combustion venting.
Step 7. Measure the Duct Route
Measure the intended lengths between connection points. Account for elbows, transitions, and equipment fittings rather than measuring only a straight-line distance. The installer should also verify the available clearance for insulation and supports.
Accurate measurements reduce the amount of cutting and rework. Long ducts can be difficult to position when surrounding building components restrict movement. Planning section lengths makes installation more manageable.
Step 8. Prepare the Metal Sections
Select preformed ducts or fabricate sections according to the approved dimensions. Check that the duct ends and seams are suitable for the intended joints. Metal edges should be handled carefully to avoid injuries.
For certain round ducts, one end may be crimped to fit the receiving section. Rectangular ducts may use different flange or connector systems. The installer should not force incompatible joint shapes together.
Step 9. Install the Supply Plenum
Position the supply plenum or approved transition at the furnace or air handler discharge. Mechanically attach it using the manufacturer's permitted method. The connection must maintain the intended airflow passage without excessive reduction.
The plenum should be supported appropriately. Large downstream trunks should not hang entirely from the equipment cabinet. Proper support also reduces vibration and strain at the connection.
Step 10. Assemble the Main Trunk Sections
Connect the metal trunk sections according to the design. For suitable round slip joints, the narrower or crimped end fits into the receiving section. Mechanically secure the joint using approved fasteners.
The Department of Energy's guidance for typical residential rigid metal joints describes using suitable sheet metal screws before sealing. Its repair example specifies three appropriately sized screws for a round connection. The actual fastening pattern should follow the product, duct size, and code requirements.
Large rectangular ducts may require specialized flanges, cleats, or other approved joining systems. Those connections should follow the duct construction standard for the project.
Step 11. Install Elbows and Transitions
Fit the required elbows and transitions between straight sections. The fittings should maintain the designed air passage and avoid unnecessary restrictions. A well-positioned elbow should connect cleanly without requiring excessive force.
A sharp transition can add resistance and create airflow noise. When space permits, suitable gradual fittings may provide better performance. The installer should use the fitting geometry specified by the design.
Step 12. Support the Main Ductwork
Install approved hangers and brackets that can carry the weight of the metal ducts. Support requirements depend on duct dimensions, metal thickness, and the particular installation. A large rectangular trunk requires a different arrangement from a small round branch.
Hangers should attach to suitable building structure rather than plumbing pipes or electrical conduit. They should maintain alignment so joints do not separate under the weight of the system.
Unlike flexible duct, there is no single four-foot hanger-spacing rule suitable for every metal duct installation. The contractor should follow the applicable mechanical code and relevant duct construction standards.
Step 13. Install Branch Takeoffs
Mark the designed branch locations along the supply trunk. Create suitable openings and attach approved takeoff collars or fittings. The connections should remain mechanically secure and match the intended branch sizes.
A takeoff should not be placed where it interferes with another fitting or weakens the trunk. The branch arrangement should reflect the airflow design. Adding outlets without evaluating the equipment and main duct capacity can reduce performance elsewhere.
Step 14. Install the Branch Ducts
Connect the metal branches to their takeoffs and register boots. Use suitable elbows and transitions where the route changes direction. Each branch should retain the dimensions required for its designed airflow.
Support the branches independently where necessary. The takeoff collar should not bear all the weight of a long metal run. Rattling or moving ducts may indicate inadequate support.
Step 15. Install the Return Duct Network
Connect appropriate return grilles and duct passages to the equipment's designated return inlet. The return ducts should have sufficient capacity to support the intended blower airflow. A restrictive return can affect the entire system.
Return joints must also be sealed. Leaks can draw dust or unconditioned air from building cavities or other unintended locations. The Department of Energy recommends fully ducted, airtight return pathways instead of relying on leaky construction cavities.
Step 16. Prepare Joints for Sealing
Inspect and clean the assembled metal duct joints. The Department of Energy recommends applying sealant to clean, dry surfaces so the closure material can bond appropriately. Loose connections should be corrected mechanically before applying mastic.
Dust and debris can interfere with sealing. A joint with a substantial gap may need a suitable metal patch or reinforcement before sealant is applied.
Step 17. Apply Duct Mastic
Seal the relevant seams and joints using compatible HVAC mastic. The Department of Energy recommends sealing longitudinal seams, elbows, trunk-to-branch connections, equipment joints, and register boot connections. Mastic should be applied according to its product instructions.
For certain gaps wider than one-eighth of an inch, Department of Energy guidance describes reinforcing the opening with fiberglass mesh before applying mastic. Larger structural openings should be repaired with appropriate metal materials rather than filled solely with sealant.
Ordinary cloth-backed duct tape should not be used as a permanent sealing method. Approved metal-backed closure tapes may be appropriate for certain applications when their listing and instructions permit them.
Step 18. Inspect the Register Boots
Connect and support the register boots at the planned room openings. The boots should remain stable when their grilles are installed or removed. Their connection to the duct must be sealed and mechanically secure.
The gap between a boot and the surrounding ceiling or floor can also allow unwanted air movement. Department of Energy guidance recommends sealing suitable boot-to-building gaps. This is particularly important where the opening communicates with an attic or other unconditioned space.
Step 19. Insulate the Metal Ducts
Install suitable insulation on ducts located outside conditioned space. The Department of Energy describes foil-faced fiberglass blanket insulation as a common exterior covering for residential metal ducts. The required R-value depends on the adopted code, climate, and location.
Air sealing should be completed before the insulation is installed. The blanket should cover the duct continuously without excessive compression. Follow the insulation manufacturer's instructions for proper sizing and overlap.
A suitable exterior vapor barrier may be necessary to reduce condensation risks. In humid conditions, unprotected cold metal surfaces can attract moisture when their temperature falls below the surrounding air's dew point.
Step 20. Seal the Insulation Covering
Bring the insulation facing together using the specified overlap and closure method. Department of Energy guidance describes foil-faced blanket installations with approximately two inches of overlap in certain applications. The exact method should follow the insulation product's instructions.
The insulation should remain at its intended thickness. Wrapping it too tightly can reduce thermal resistance. Seams in the outer facing should be sealed where required to maintain suitable vapor protection.
Step 21. Inspect the Complete Duct Network
Walk through the accessible installation and look for unsupported sections, loose joints, open seams, missing insulation, or restricted passages. Verify that the ductwork does not block electrical panels, equipment service access, or other required building clearances.
Check that all supply and return passages connect to their intended destinations. Ensure that no construction debris remains inside accessible ducts before normal operation.
Step 22. Perform Duct Leakage Testing
Use appropriate professional testing methods to evaluate air leakage. A duct pressurization test can identify openings that are difficult to detect visually. Testing may be required under the applicable energy code or performance program.
Significant leakage should be corrected before ducts are concealed by finished construction. Sealing every visible joint does not automatically prove that the complete network meets the required leakage level.
Step 23. Verify Airflow and Static Pressure
Operate the HVAC system after all connections and equipment panels are secure. Measure system static pressure and evaluate register airflow where appropriate. Compare the results with the design and the equipment's blower performance information.
Balancing dampers may need adjustment to deliver the intended airflow to different rooms. The goal is to meet room heating and cooling requirements, not to make every outlet deliver identical air quantities.
Step 24. Complete Final Documentation
Record the installed duct layout and material specifications. Keep available test results and any required inspection records. These documents help future technicians locate the trunks, dampers, and concealed connections.
The installation should be accepted only after the ducts are secure, appropriately sealed and insulated, and operating within the intended airflow range.
How Do You Connect Round Metal Ductwork?
Round metal ducts typically connect using compatible slip joints, couplings, or approved fittings. In a common arrangement, a crimped end fits inside a receiving duct end. The joint is then fastened mechanically and sealed.
The Department of Energy's typical residential repair method uses suitable sheet metal screws and duct mastic for rigid metal connections. The specific fastener count and size should follow the actual joint construction and applicable requirements. Screws should not be excessively long or installed where they could interfere with equipment components.
A secure joint should maintain the duct's circular shape. If the material is bent or crushed at the connection, it may need to be corrected before sealing.
How Do You Connect Rectangular Metal Ductwork?
Rectangular ducts commonly connect using approved flanges, cleats, slip-and-drive connectors, or other suitable systems. The method depends on the duct size and construction standard. Large trunks may need additional reinforcement to prevent deformation.
Connections should be aligned before fastening. The installer should not rely on mastic alone to hold large rectangular sections together. Mechanical support and sealing serve separate purposes.
A custom rectangular transition may be required where duct dimensions change. The fitting should preserve the designed airflow capacity and avoid unnecessary restrictions.
How Do You Seal Sheet Metal Ductwork?
The Department of Energy recommends mastic sealing at duct joints and seams. The metal should be clean and dry, and the sections should already be mechanically secured. Suitable reinforcement may be necessary for wider gaps.
Approved UL 181-compatible closure materials can also be used where permitted. Ordinary cloth-backed duct tape may deteriorate and fail over time. A properly sealed duct should remain mechanically secure even if its exterior insulation is removed for inspection.
Sealing should include plenum connections, branch takeoffs, elbows, and register boots where appropriate. Focusing only on straight seams can leave substantial leakage at fittings.
Does Metal Ductwork Need Insulation?
Metal ducts installed outside conditioned space generally require insulation under applicable energy codes. In unconditioned attics, insulation helps limit heat gain during cooling and heat loss during heating. It can also reduce condensation risks when properly installed.
Common insulation products include foil-faced fiberglass blanket duct wrap. The required thermal resistance varies according to location and local requirements. The contractor should verify the adopted code rather than assume one rating applies to every system.
Metal ducts inside conditioned space may have different insulation requirements. However, equipment-specific conditions and condensation potential still need evaluation.
How Much Does Metal Duct Installation Cost?
Metal duct installation costs depend on duct shape, size, fabrication, and accessibility. Published 2026 U.S. estimates for some sheet metal replacement projects are around $15 to $25 per linear foot. New installation or finished-home retrofit work can cost more when it includes custom fittings and extensive construction.
A large rectangular trunk is not directly comparable with a small round branch priced by length. The amount of metal and the number of connections differ. Supports, insulation, and testing also contribute to the finished price.
A contractor should provide an itemized quote identifying the duct dimensions, material, fittings, and labor. Per-foot material pricing alone does not describe the cost of a completed air distribution system.
Can You Install Metal Ductwork Yourself?
Experienced homeowners may be able to complete limited work on safely accessible, correctly sized rigid ducts. However, new duct networks and major trunk modifications require proper airflow design. Incorrect dimensions or inadequate return capacity can affect heating and cooling performance throughout the home.
Sheet metal cutting also presents injury hazards, while attic and crawlspace access may introduce additional risks. Older insulation should be assessed before disturbance when hazardous materials are suspected. Work near furnaces and air handlers may involve electrical and combustion safety requirements.
Qualified HVAC installation is recommended for complete systems, major trunks, and equipment connections.
What Mistakes Should You Avoid During Metal Duct Installation?
Metal ducts can remain physically rigid while still performing poorly because of assembly defects. The most common problems involve airflow sizing, unsupported joints, and incomplete sealing.
Avoid these mistakes:
- Choosing duct dimensions without airflow calculations.
- Installing restrictive elbows and abrupt reductions.
- Cutting structural framing without approval.
- Using inadequate support for heavy trunks.
- Leaving rigid joints mechanically unsecured.
- Applying mastic over dirty or unstable surfaces.
- Using ordinary cloth-backed duct tape as a permanent seal.
- Failing to seal branch takeoffs and plenum joints.
- Connecting ducts to prohibited return-air locations.
- Installing uninsulated ducts in unconditioned spaces where insulation is required.
- Compressing duct wrap and reducing its effective thickness.
- Leaving exterior vapor-barrier seams open.
- Blocking HVAC equipment access.
- Confusing room-air ductwork with combustion exhaust flues.
- Closing finished ceilings before leakage testing.
- Skipping final airflow and static pressure checks.
Correct installation combines appropriate mechanical assembly with a sound airflow design. New metal material alone cannot compensate for restrictive dimensions or substantial air leakage.
How Can You Maintain Metal Ductwork?
Metal ducts generally require limited maintenance when installed correctly. Accessible joints and supports should be inspected during routine HVAC service. Loose fittings or damaged insulation should be corrected before they create larger problems.
Water leaks and persistent condensation deserve attention because metal can corrode under repeated exposure. The source of moisture should be repaired rather than simply covering the damaged area. Sound sheet metal with a small localized leak may be repairable without replacement.
Keep return grilles unobstructed and maintain filters according to the equipment manufacturer's instructions. These actions help protect the HVAC equipment while the duct network continues operating as designed.
Conclusion
Installing metal ductwork requires proper sizing, compatible fittings, mechanical fastening, suitable supports, and airtight joints. Rigid metal trunks and branches should follow an approved layout that provides adequate supply and return airflow. Insulation and vapor protection are important when ducts pass through unconditioned spaces. The completed network should be tested before it is hidden behind finished construction. For substantial installations, use a qualified HVAC contractor who can design the system and verify its performance.